搜索到
27
篇与
的结果
-
 sed命令高级技巧 写入多条命令sed -i '/UseDNS/{ s/yes/no/ s/#// }' /etc/ssh/sshd_config #效果:将#UseDNS yes 该为:UseDNS no #注:此条命令是关闭ssh的DNS反查,可以加快ssh连接速度。 #或者使用-e参数 sed -ie ' /Use/s/#// s/yes/no/ ' /etc/ssh/sshd_config ls -l | awk '{print"\"" $9" " $10" "$(11)"\""}'| sed -e 's/NSD ADMIN // ' -e 's/[A-Z]/\l&/g'; 关于最后一条命令的解释:-e选项: 在单次运行中执行多个编辑命令。它的作用是 将后续的字符串参数视为独立的 sed 脚本命令,并按顺序依次应用这些命令到输入文本中。s/[A-Z]/1&/g:将所有的大写字母转换为小写删除第一个匹配到的行sed -i '0,/pattern/{/pattern/d;}' filename说明:0,/pattern/:表示从文件开始到第一个匹配 pattern 的行。/pattern/ 是匹配条件。{/pattern/d;}:{} 是一个命令块,对匹配到的行执行其中的命令。/pattern/d 表示删除匹配到的行。示例假设有如下文件test.txt line 1 pattern line 2 pattern line 3 只想删除第一个匹配到 pattern 的行,可以使用: sed '0,/pattern/{/pattern/d;}' test.txt 执行后,文件内容变为: line 1 line 2 pattern line 3多行处理技巧# 将多行合并为一行 sed ':a;N;$!ba;s/\n/ /g' file.txt # 每两行合并为一行 sed 'N;s/\n/ /' file.txt # 删除匹配行及其下一行 sed '/pattern/{N;d;}' file.txt
 -
rsync命令(可替代rm删除巨量文件) 当一个文件夹下面有海量的文件需要删除时,使用rm命令往往可能会遇到问题。一个问题是删除速度慢,往往需要几分钟到几十分钟不等的时间才能完成操作;另一个问题是可能会有参数溢出的问题导致rm命令报错。此时,可以使用rsync命令来执行删除操作,主要用到的参数是--delete。比如,可以看到下面的例子中a文件夹下面有246803个文件。要删除这些文件,可以先建一个空文件夹b,然后用rsync命令让b文件夹与a文件夹进行同步。ls | wc -l 246803 #rm命令报错 rm -f * -bash: /usr/bin/rm: Argument list too long #使用rsync命令 rsync -av --delete /tset/b/ /tset/a/ #使用一个空的文件夹与a同步,使用--delete参数删除只存在于目标目录、不存在于源目录的文件。 sent 43 bytes received 3,676,572 bytes 294,129.20 bytes/sec total size is 0 speedup is 0.00 {lamp/}rsync :同步:增量拷贝,只传输变化过的数据命令参数详解rsync [选项...] 源目录 目标目录-n:测试同步过程,不做实际修改--delete:删除目标文件夹内多余的文档-a:归档模式,相当于-rlptgoD-v:显示详细操作信息-z:传输过程中启用压缩/解压--exclude 排除文件--include 用来指定必须同步的文件模式#同步时排除某些文件或目录 rsync -av --exclude='*.txt' source/ destination rsync -av --exclude '*.txt' source/ destination #上面命令排除了所有 TXT 文件。 #注意,rsync 会同步以“点”开头的隐藏文件,如果要排除隐藏文件,可以这样写--exclude=".*"。 #如果要排除某个目录里面的所有文件,但不希望排除目录本身,可以写成下面这样: rsync -av --exclude 'dir1/*' source/ destination #多个排除模式,可以用多个--exclude参数 rsync -av --exclude 'file1.txt' --exclude 'dir1/*' source/ destination rsync -av --exclude={'file1.txt','dir1/*'} source/ destination #如果排除模式很多,可以将它们写入一个文件,每个模式一行,然后用--exclude-from参数指定这个文件 rsync -av --exclude-from='exclude-file.txt' source/ destination关于/的注意事项不加/,源目录source会被完整的复制到目标目录destination下面,形成/destination/source 这样的目录结构源目录source后面有/,则只是将source目录里面的内容完整的同步到destination目录下,而不同步source目录本身。rsync -a source destination #destination目录下会有一个source文件夹 rsync -a source/ destination #destination目录下面会有source文件夹里面的内容,而没有source本身。其他rsync命令#模拟同步操作,显示将要发生的更改,但不实际执行。 rsync --dry-run source_dir destination_dir #限制带宽使用率,以 KB/s 为单位,在同步过程中限制带宽使用率为 500 KB/s rsync --bwlimit=500 source_dir destination_dir #允许在中断后重新传输,同时显示实时进度 rsync --progress --partial source_dir destination_dir #仅同步小于 100KB 的文件 rsync -a --max-size='100K' source_dir destination_dir #仅同步大于 1MB 的文件 rsync -a --min-size='1M' source_dir destination_dir #只同步文件夹,忽略文件 rsync -a --include='*/' --exclude='*' source_dir destination_dir #将同步过程信息记录到指定的日志文件中 rsync -avzP --log-file='log.txt' source_dir destination_dir #排除所有的 .txt 文件,并在目标目录中删除已排除的文件 rsync -a --exclude='*.txt' --delete-excluded source_dir destination_dir
-
shell脚本调试技巧 {card-default label=" 使用dos2unix处理外部脚本 " width=""}windows平台开发的代码其换行符和linux下的不一样,使用dos2unix工具格式化一下,可以解决该问题{/card-default}yum -y install dos2unix dos2unix xx.sh{card-default label=" 使用bash命令参数调试 " width=""}sh -nvx xx.sh{/card-default}-n: 不会执行该脚本,仅查询该脚本语法是否有问题,并给出错误提示。-v: 在执行脚本时,先将脚本的内容输出到屏幕上,然后执行脚本,如果有错误,给出错误提示。-x: 将执行的脚本内容及输出打印到屏幕上,常用的参数。# 在脚本的执行过程中输出行号,以便于跟踪。 #实现方法为设置环境变量。 [root@VM-4-6-centos ~]\# set | grep PS[1-5] PS1='[\u@\h \W]\$ ' PS2='> ' PS4='+ ' #PS4默认情况下表示加号。 [root@VM-4-6-centos ~]\# export PS4='+${LINENO}' #此命令即可实现在跟踪过程中显示行号,也可放在脚本中。{card-default label=" 使用set命令调试部分脚本内容 " width=""}通过set -x 命令开启调试功能,通过set +x 关闭调试功能{/card-default}set -n:读命令但不执行set -v:显示读取的所有行set -x:显示所有命令及其参数{callout color="#f0ad4e"}set 命令的最大优点是相比bash -x 可以缩小调试的作用域{/callout}cat xx.sh #!/bin/bash set -x for a in `seq 9` do for b in `seq 9` do [ $a -ge $b ] && echo -en "$a x $b = $(expr $a \* $b)" done set +x #说明:只调试a=1时程序运行过程,当a=2时结束调试过程。 echo " " done{card-default label=" 使用工具进行脚步调试 " width=""}bashdb或者shellcheck{/card-default}yum -y install ShellCheck
-
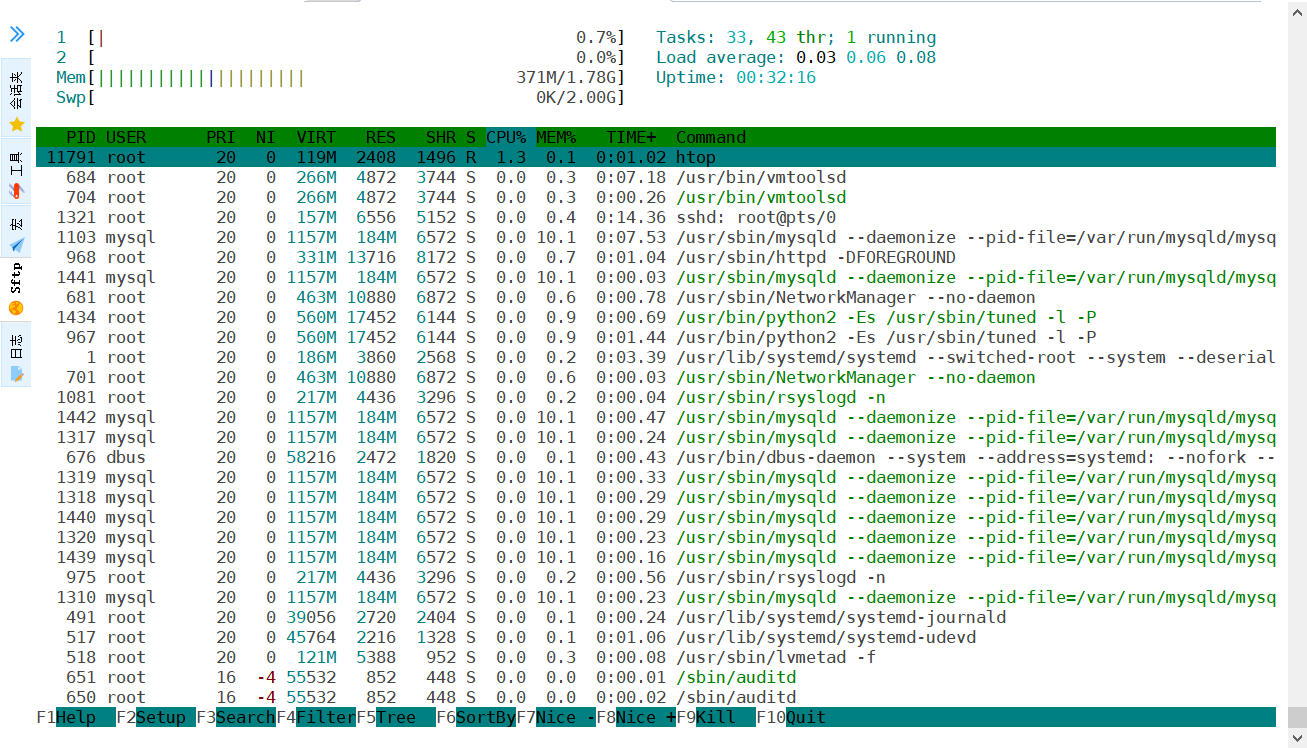
系统性能分析工具 cputop top -b -n 1 | awk 'NR==3' %Cpu(s): 3.0 us, 0.0 sy, 0.0 ni, 97.0 id, 0.0 wa, 0.0 hi, 0.0 si, 0.0 st # us 用户空间占用CPU百分比 # sy 内核空间占用CPU百分比 # ni 用户进程空间内改变过优先级的进程占用CPU百分比 # id 空闲CPU百分比,例如:77.1%id # wa 等待输入输出的CPU时间百分比 # hi CPU服务于硬件中断所耗费的时间总额 # si CPU服务软中断所耗费的时间总额 # st Steal time 虚拟机被hypervisor偷去的CPU时间(如果当前处于一个hypervisor下的vm,实际上hypervisor也是要消耗一部分CPU处理时间的)htop# 系统默认没有安装该命令,需要先安装 yum -y install htopvmstat类别参数含义说明procs进程r等待执行的任务数展示了正在执行和等待cpu资源的任务个数。当这个值超过了cpu个数,就会出现cpu瓶颈。 b等待IO的进程数量 memory内存swpd正在使用虚拟的内存大小,单位k free空闲内存大小 buff已用的buff大小,对块设备的读写进行缓冲 cache已用的cache大小,文件系统的cache inact非活跃内存大小,即被标明可回收的内存,区别于free和active当使用-a选项时显示 active活跃的内存大小当使用-a选项时显示swapsi每秒从交换区写入内存的大小(单位:kb/s) so每秒从内存写到交换区的大小 iobi每秒读取的块数(读磁盘)块设备每秒接收的块数量,单位是block,这里的块设备是指系统上所有的磁盘和其他块设备,现在的Linux版本块的大小为1024bytes bo每秒写入的块数(写磁盘)块设备每秒发送的块数量,单位是blocksystemin每秒中断数,包括时钟中断这两个值越大,会看到由内核消耗的cpu时间sy会越多 cs每秒上下文切换数每秒上下文切换次数,例如我们调用系统函数,就要进行上下文切换,线程的切换,也要进程上下文切换,这个值要越小越好,太大了,要考虑调低线程或者进程的数目cpuus用户进程执行消耗cpu时间(user time)us的值比较高时,说明用户进程消耗的cpu时间多,但是如果长期超过50%的使用,那么我们就该考虑优化程序算法或其他措施了 sy系统进程消耗cpu时间(system time)sys的值过高时,说明系统内核消耗的cpu资源多,这个不是良性的表现,我们应该检查原因。这里us + sy的参考值为80%,如果us+sy 大于 80%说明可能存在CPU不足 ld空闲时间(包括IO等待时间)一般来说 us+sy+id=100 wa等待IO时间wa过高时,说明io等待比较严重,这可能是由于磁盘大量随机访问造成的,也有可能是磁盘的带宽出现瓶颈。内存free free -h| awk 'NR==2{print "内存大小:"$2"\t已经使用:"$3"\t剩余内存大小:"$4}'topvmstat见上文硬盘dfiotopyum -y install iotop参数描述-o只显示正在产生I/O的进程或线程,运行过程中,可以通过按o随时切换-b非交互式下运行,一般用来记录日志-n设置监控(显示)次数,主要用于非交互式,默认无限-d设置显示的间隔秒数,支持非整数-p只显示指定进程(PID)的信息-u显示指定用户的进程信息-P只显示进程,不显示所有线程-a累积的I/O,显示从iotop启动后每个进程累积的I/O总数,便于诊断问题-k显示使用KB单位-t非交互模式下,加上时间戳-q只在第一次监测时显示列名. 去除头部一些行:这个参数可以设置最多3次来移除头部行:-q列头部只在最初交互显示一次;-qq列头部不显示;-qqq,I/O的总结不显示vmstat见上文网络流量iftopyum -y install iftop点击查看该命令的具体用法 用法示例iftop -i eth0 -nNB -m 10M #-i 指定网卡 #-n 代表主机通过ip显示不走DNS #-N 只显示连接端口号,不显示端口对应的服务名称(不加会显示如ssh这样的服务名称,不便于排查) #-B 指定显示单位为Kb,默认是bit,太小! #-m 设置输出界面中最上面的流量刻度最大值,流量刻度分5个大段显示iptrafyum -y install iptraf iptraf-ng -d eth0网络连接netstat与ss一般用法: ss -ntulp | grep xxx进程pstop一般用法:ps -ef: 显示系统中所有进程的列表,包括其他用户的进程ps -aux: 显示详细的进程信息,包括CPU和内存使用情况等ps -ef | grep <进程名>:查找指定进程名的进程。 ps -ef | grep -v grep | grep <用户>:查找指定用户的进程。 ps -ef --forest:以树形结构显示进程和它们的父进程。 ps -eo pid,ppid,cmd,%mem,%cpu --sort=-%mem | head:按内存使用率排序显示前几个进程的信息。
-
vm命令演示(虚拟机) [root@server1 ~]# man vm NAME vm ‐ virtual machine tool. 语法: vm [选项]... 虚拟机名称... 描述: vm是使用shell编写的虚拟机脚本管理程序, vm支持的选项有:{clone|clonebase|clonemysql|remove|setip}. clone可以基于模板虚拟机克隆新的虚拟机(虚拟机包含2块网卡). clonebase可以基于模板克隆新的虚拟机(虚拟机包含1块网卡). clonemysql可以基于模板克隆新的虚拟机(虚拟机包含mysql相关数据). remove可以删除若干台虚拟机. setip可以通过脚本自动给虚拟机配置IP地址. 案例: 1)克隆一台名称为myvm的虚拟机(包含2块网卡). # vm clone myvm 2)克隆一台包含1块网卡的虚拟机,虚拟机名称为demo. # vm clonebase demo 3)克隆一台msyql虚拟机,虚拟机名称为host22. # vm clonemysql host22 4)删除名称为myvm的虚拟机. # vm remove myvm 5)为名称为demo的虚拟机设置IP地址(IP地址为192.168.88.100). # vm setip demo 192.168.88.100 6)循环批量创建虚拟机(myvm_1,myvm_2,myvm_3,myvm_4,myvm_5). # vm clone myvm{1..5} 7)循环批量删除虚拟机(myvm_1,myvm_2,myvm_3,myvm_4,myvm_5). # vm remove myvm{1..5} 示例# 创建名为node1的虚拟机。 [root@server1 ~]# vm clone node1 Domain node1 started [ OK ] # 创建完成后,虚拟机自动启动。可以通过系统命令查看: [root@server1 ~]# virsh list Id Name State ---------------------------------------------------- 1 node1 running # 为创建的、名为node1的虚拟机配置IP地址:192.168.88.11 [root@server1 ~]# vm setip node1 192.168.88.11 # 登录虚拟机,默认密码为a [root@server1 ~]# ssh 192.168.88.11 root@192.168.88.11's password: # 修改yum配置 [root@localhost ~]# vim /etc/yum.repos.d/local.repo [BaseOS] name=CentOS Linux $releasever - BaseOS baseurl=ftp://192.168.88.240/dvd enabled=1 gpgcheck=1 # 删除名为node1的虚拟机 [root@server1 ~]# vm remove node1 vm node1 delete [ OK ] # 创建2台虚拟机,名称分别为web和db [root@server1 ~]# vm clone web db Domain web started [ OK ] Domain db started [ OK ] # 创建3台虚拟机,名称分别为node1、node2和node3 [root@server1 ~]# vm clone node{1..3} Domain node1 started [ OK ] Domain node2 started [ OK ] Domain node3 started [ OK ] # 删除刚才创建的5台虚拟机 [root@server1 ~]# vm remove web db node{1..3} vm web delete [ OK ] vm db delete [ OK ] vm node1 delete [ OK ] vm node2 delete [ OK ] vm node3 delete [ OK ]