搜索到
69
篇与
的结果
-
 HTTP状态码解读 {callout color="#ff0000"}HTTP状态码是用来表示WEB服务器响应HTTP请求状态的数字代码。每当WEB客户端向服务器发送一个HTTP请求时,WEB服务器都会返回一个状态响应代码。这个代码是一个三位的数字,作用是告知WEB客户端此次请求是否成功,或者是否需要采取其他的动作方式{/callout}不同范围的状态码及其对应的作用100~199 用于指定客户端相应的某些动作200~299 用于表示请求成功300~399 (重定向)用于已经移动的文件,并且常被包含在定位头信息中指定新的地址400~499 用于指出客户端的错误500~599 用于指出服务器的错误常见状态码及其对应的作用200 服务器成功返回网页。这是成功的HTTP请求返回的标准状态码301 Moved Permanently 永久重定向302 临时重定向403 Forbidden 禁止访问,虽然这个访问是合法的,但是服务器端因为匹配了预先设置的规则而拒绝响应客户端的请求,此类问题一般为服务器或服务权限配置不当所致。典型的如nginx配置文件中没有配置默认首页参数,或者首页文件在站点目录下不存在。也可能是nginx没有站点目录或内部程序文件的访问权限,或者nginx配置文件中设置了allow或者deny等权限控制。404 Not Found 服务器找不到客户端请求的指定页面,可能是客户端请求了服务器上不存在的资源所致500 Internal Server Error 内部服务器错误,服务器遇到了意料之外的情况,不能完成客户端的请求。这是一个较为笼统的报错,一般为服务器的设置或内部程序问题导致。例如,SELinux开启,而又没有为HTTP设置规则许可,客户端访问就是500502 Bad Gateway 网关报错,一般是代理服务器请求后端服务时,后端服务器不可用或没有完成响应网关服务器。这通常为反向代理服务器下面的节点出问题所致。503 Service Unavailable 服务当前不可用,可能是服务器超载或停机维护所致,或者是反向代理服务器后面没有可以提供服务的节点504 Gateway Timeout 网关超时,一般是网关代理服务器请求后端服务时,后端服务没有在特定的时间内完成处理请求。多数是服务器过载导致没有在指定的时间内返回数据给前段代理服务器。其他状态码及其对应的作用201 (已创建) 请求成功并且服务器创建了新的资源202 (已接受) 服务器已接受请求,但尚未处理203 (非授权信息) 服务器已成功处理了请求,但返回的信息可能来自另一来源204 (无内容) 服务器成功处理了请求,但没有返回任何内容205 (重置内容) 服务器成功处理了请求,但没有返回任何内容206 (部分内容) 服务器成功处理了部分 GET 请求303 (查看其他位置) 请求者应当对不同的位置使用单独的 GET 请求来检索响应时,服务器返回此代码304 (未修改) 自从上次请求后,请求的网页未修改过。 服务器返回此响应时,不会返回网页内容305 (使用代理) 请求者只能使用代理访问请求的网页。 如果服务器返回此响应,还表示请求者应使用代理307 (临时重定向) 服务器目前从不同位置的网页响应请求,但请求者应继续使用原有位置来进行以后的请求401 (未授权) 请求要求身份验证。 对于需要登录的网页,服务器可能返回此响应405 (方法禁用) 禁用请求中指定的方法406 (不接受) 无法使用请求的内容特性响应请求的网页407 (需要代理授权) 此状态代码与 401(未授权)类似,但指定请求者应当授权使用代理408 (请求超时) 服务器等候请求时发生超时409 (冲突) 服务器在完成请求时发生冲突。 服务器必须在响应中包含有关冲突的信息410 (已删除) 如果请求的资源已永久删除,服务器就会返回此响应411 (需要有效长度) 服务器不接受不含有效内容长度标头字段的请求412 (未满足前提条件) 服务器未满足请求者在请求中设置的其中一个前提条件413 (请求实体过大) 服务器无法处理请求,因为请求实体过大,超出服务器的处理能力414 (请求的 URI 过长) 请求的 URI(通常为网址)过长,服务器无法处理415 (不支持的媒体类型) 请求的格式不受请求页面的支持416 (请求范围不符合要求) 如果页面无法提供请求的范围,则服务器会返回此状态代码417 (未满足期望值) 服务器未满足”期望”请求标头字段的要求501 (尚未实施) 服务器不具备完成请求的功能。 例如,服务器无法识别请求方法时可能会返回此代码505 (HTTP 版本不受支持) 服务器不支持请求中所用的 HTTP 协议版本
 -
docker与k8s命令合集 docker命令格式参数选项说明docker info 查看 docker 的运行信息docker version 查看服务器和客户端版本docker images 查看本机镜像docker search 关键字 从官方仓库查找镜像docker pull img:tag 下载镜像docker push img:tag 上传镜像docker login 登录镜像仓库docker logout 登出镜像仓库docker save img:tag -o backup.tar-o 备份文件名备份镜像为tar包docker load -i backup.tar-i 备份文件名 导入备份的镜像文件docker history img:tag--no-trunc 完整显示查看镜像的制作历史docker inspect object-f 指定具体节点查看对象的详细信息docker tag img:tag name:tag 创建新的镜像名称和标签docker rmi img: tag 删除镜像docker run img:tag cmd-i 交互式,-t 分配终端运行一个新容器 -d 放在后台运行 --rm 临时容器,容器结束后会被删除 -h 主机名,-e 变量 --name 容器名 --restart=[no,always]容器重启策略 --link 容器名:别名添加 hosts 解析 -m, --cpus, --cpuset-cpus设置内存、cpu使用限制及亲和性docker create参数同 docker run创建容器,但不启动运行docker ps-a 显示所有容器查看容器进程 -q 只显示容器id docker rm-f 强制删除删除容器docker start\stop\restart 启动、停止、重启容器docker cp 拷贝文件到容器/从容器拷贝文件docker exec -it -- cmd 进入容器内,启动新进程docker attach[ctrl+p, ctrl+q] 退出,不会终止容器进入一个容器的启动程序docker logs 查看容器终端显示信息docker port 查看容器的端口映射信息docker kill--signal=信号名称向容器发送信号docker pause 暂停容器docker unpause 恢复暂停的容器docker update不能超过 --memory-swap 的值,-1表示无限更改容器配置策略(资源限制)docker stats 查看容器对资源的占用情况docker top 查看容器内运行的进程docker diffA 增加、D 删除、C 变化根据镜像排查文件系统变化docker wait 阻塞直到容器停止,返回退出码docker rename c_name n_name 改变容器名称docker export-o 备份文件名备份容器的 / 目录为 tar 文件docker import backup.tar-c 可以指定Dockerfile语法的命令导入文件到空 / 目录,没有任何配置docker commit img:tag 把容器做成镜像docker build-f 可以指定 dockerfile 的文件名称根据Dockerfile打包制作镜像k8skubectl管理命令子命令说明备注help用于查看命令及子命令的帮助信息 cluster-info显示集群的相关配置信息 version查看服务器及客户端的版本信息 api-resources查看当前服务器上所有的资源对象 api-versions查看当前服务器上所有资源对象的版本 config管理当前节点上kubeconfig 的认证信息 run创建Pod资源对象一般用来创建 Pod 模板get查看资源对象的状态信息可选参数: -o 显示格式describe查询资源对象的属性信息 logs查看容器的报错信息可选参数: -c 容器名称exec在某一个容器内执行特定的命令可选参数: -c 容器名称cp在容器和宿主机之间拷贝文件或目录可选参数: -c 容器名称delete删除资源对象可选参数: -f 文件名称create创建资源对象必选参数: -f 文件名称apply(创建/更新)资源对象必选参数: -f 文件名称
-
shell脚本调试技巧 {card-default label=" 使用dos2unix处理外部脚本 " width=""}windows平台开发的代码其换行符和linux下的不一样,使用dos2unix工具格式化一下,可以解决该问题{/card-default}yum -y install dos2unix dos2unix xx.sh{card-default label=" 使用bash命令参数调试 " width=""}sh -nvx xx.sh{/card-default}-n: 不会执行该脚本,仅查询该脚本语法是否有问题,并给出错误提示。-v: 在执行脚本时,先将脚本的内容输出到屏幕上,然后执行脚本,如果有错误,给出错误提示。-x: 将执行的脚本内容及输出打印到屏幕上,常用的参数。# 在脚本的执行过程中输出行号,以便于跟踪。 #实现方法为设置环境变量。 [root@VM-4-6-centos ~]\# set | grep PS[1-5] PS1='[\u@\h \W]\$ ' PS2='> ' PS4='+ ' #PS4默认情况下表示加号。 [root@VM-4-6-centos ~]\# export PS4='+${LINENO}' #此命令即可实现在跟踪过程中显示行号,也可放在脚本中。{card-default label=" 使用set命令调试部分脚本内容 " width=""}通过set -x 命令开启调试功能,通过set +x 关闭调试功能{/card-default}set -n:读命令但不执行set -v:显示读取的所有行set -x:显示所有命令及其参数{callout color="#f0ad4e"}set 命令的最大优点是相比bash -x 可以缩小调试的作用域{/callout}cat xx.sh #!/bin/bash set -x for a in `seq 9` do for b in `seq 9` do [ $a -ge $b ] && echo -en "$a x $b = $(expr $a \* $b)" done set +x #说明:只调试a=1时程序运行过程,当a=2时结束调试过程。 echo " " done{card-default label=" 使用工具进行脚步调试 " width=""}bashdb或者shellcheck{/card-default}yum -y install ShellCheck
-
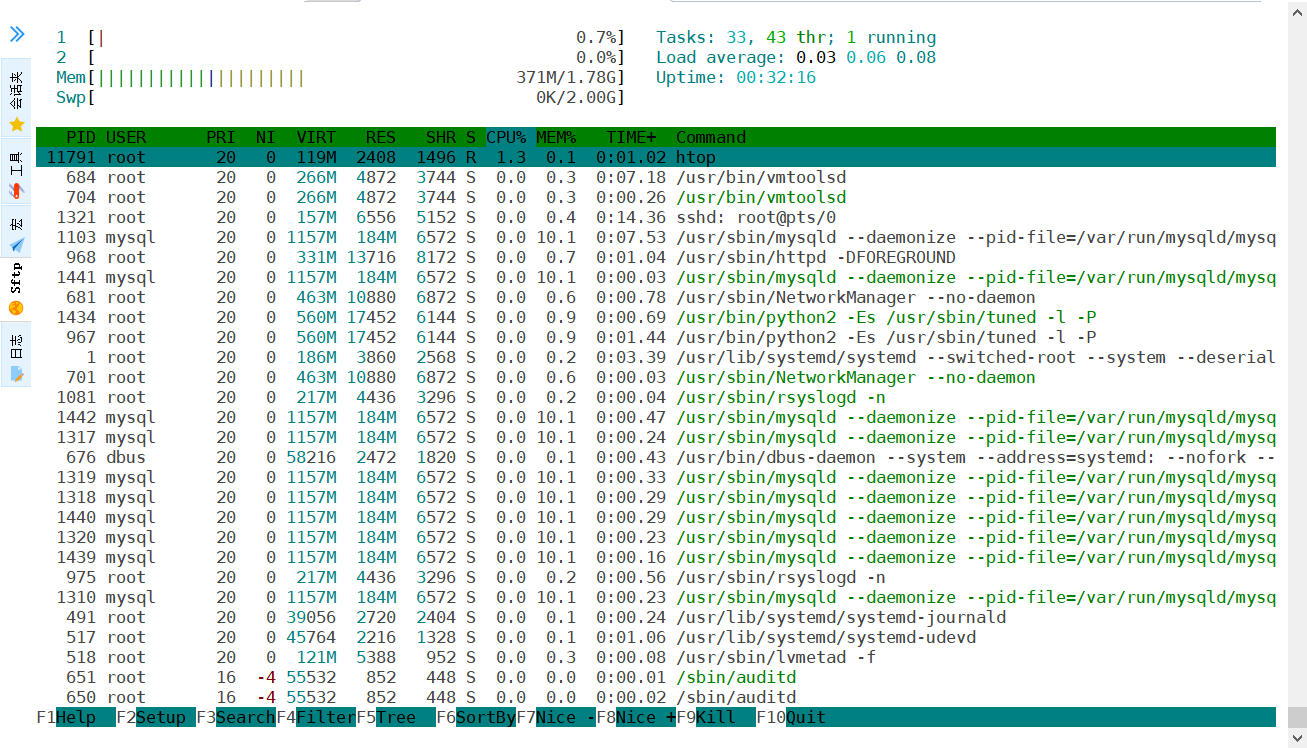
系统性能分析工具 cputop top -b -n 1 | awk 'NR==3' %Cpu(s): 3.0 us, 0.0 sy, 0.0 ni, 97.0 id, 0.0 wa, 0.0 hi, 0.0 si, 0.0 st # us 用户空间占用CPU百分比 # sy 内核空间占用CPU百分比 # ni 用户进程空间内改变过优先级的进程占用CPU百分比 # id 空闲CPU百分比,例如:77.1%id # wa 等待输入输出的CPU时间百分比 # hi CPU服务于硬件中断所耗费的时间总额 # si CPU服务软中断所耗费的时间总额 # st Steal time 虚拟机被hypervisor偷去的CPU时间(如果当前处于一个hypervisor下的vm,实际上hypervisor也是要消耗一部分CPU处理时间的)htop# 系统默认没有安装该命令,需要先安装 yum -y install htopvmstat类别参数含义说明procs进程r等待执行的任务数展示了正在执行和等待cpu资源的任务个数。当这个值超过了cpu个数,就会出现cpu瓶颈。 b等待IO的进程数量 memory内存swpd正在使用虚拟的内存大小,单位k free空闲内存大小 buff已用的buff大小,对块设备的读写进行缓冲 cache已用的cache大小,文件系统的cache inact非活跃内存大小,即被标明可回收的内存,区别于free和active当使用-a选项时显示 active活跃的内存大小当使用-a选项时显示swapsi每秒从交换区写入内存的大小(单位:kb/s) so每秒从内存写到交换区的大小 iobi每秒读取的块数(读磁盘)块设备每秒接收的块数量,单位是block,这里的块设备是指系统上所有的磁盘和其他块设备,现在的Linux版本块的大小为1024bytes bo每秒写入的块数(写磁盘)块设备每秒发送的块数量,单位是blocksystemin每秒中断数,包括时钟中断这两个值越大,会看到由内核消耗的cpu时间sy会越多 cs每秒上下文切换数每秒上下文切换次数,例如我们调用系统函数,就要进行上下文切换,线程的切换,也要进程上下文切换,这个值要越小越好,太大了,要考虑调低线程或者进程的数目cpuus用户进程执行消耗cpu时间(user time)us的值比较高时,说明用户进程消耗的cpu时间多,但是如果长期超过50%的使用,那么我们就该考虑优化程序算法或其他措施了 sy系统进程消耗cpu时间(system time)sys的值过高时,说明系统内核消耗的cpu资源多,这个不是良性的表现,我们应该检查原因。这里us + sy的参考值为80%,如果us+sy 大于 80%说明可能存在CPU不足 ld空闲时间(包括IO等待时间)一般来说 us+sy+id=100 wa等待IO时间wa过高时,说明io等待比较严重,这可能是由于磁盘大量随机访问造成的,也有可能是磁盘的带宽出现瓶颈。内存free free -h| awk 'NR==2{print "内存大小:"$2"\t已经使用:"$3"\t剩余内存大小:"$4}'topvmstat见上文硬盘dfiotopyum -y install iotop参数描述-o只显示正在产生I/O的进程或线程,运行过程中,可以通过按o随时切换-b非交互式下运行,一般用来记录日志-n设置监控(显示)次数,主要用于非交互式,默认无限-d设置显示的间隔秒数,支持非整数-p只显示指定进程(PID)的信息-u显示指定用户的进程信息-P只显示进程,不显示所有线程-a累积的I/O,显示从iotop启动后每个进程累积的I/O总数,便于诊断问题-k显示使用KB单位-t非交互模式下,加上时间戳-q只在第一次监测时显示列名. 去除头部一些行:这个参数可以设置最多3次来移除头部行:-q列头部只在最初交互显示一次;-qq列头部不显示;-qqq,I/O的总结不显示vmstat见上文网络流量iftopyum -y install iftop点击查看该命令的具体用法 用法示例iftop -i eth0 -nNB -m 10M #-i 指定网卡 #-n 代表主机通过ip显示不走DNS #-N 只显示连接端口号,不显示端口对应的服务名称(不加会显示如ssh这样的服务名称,不便于排查) #-B 指定显示单位为Kb,默认是bit,太小! #-m 设置输出界面中最上面的流量刻度最大值,流量刻度分5个大段显示iptrafyum -y install iptraf iptraf-ng -d eth0网络连接netstat与ss一般用法: ss -ntulp | grep xxx进程pstop一般用法:ps -ef: 显示系统中所有进程的列表,包括其他用户的进程ps -aux: 显示详细的进程信息,包括CPU和内存使用情况等ps -ef | grep <进程名>:查找指定进程名的进程。 ps -ef | grep -v grep | grep <用户>:查找指定用户的进程。 ps -ef --forest:以树形结构显示进程和它们的父进程。 ps -eo pid,ppid,cmd,%mem,%cpu --sort=-%mem | head:按内存使用率排序显示前几个进程的信息。
-
vm命令演示(虚拟机) [root@server1 ~]# man vm NAME vm ‐ virtual machine tool. 语法: vm [选项]... 虚拟机名称... 描述: vm是使用shell编写的虚拟机脚本管理程序, vm支持的选项有:{clone|clonebase|clonemysql|remove|setip}. clone可以基于模板虚拟机克隆新的虚拟机(虚拟机包含2块网卡). clonebase可以基于模板克隆新的虚拟机(虚拟机包含1块网卡). clonemysql可以基于模板克隆新的虚拟机(虚拟机包含mysql相关数据). remove可以删除若干台虚拟机. setip可以通过脚本自动给虚拟机配置IP地址. 案例: 1)克隆一台名称为myvm的虚拟机(包含2块网卡). # vm clone myvm 2)克隆一台包含1块网卡的虚拟机,虚拟机名称为demo. # vm clonebase demo 3)克隆一台msyql虚拟机,虚拟机名称为host22. # vm clonemysql host22 4)删除名称为myvm的虚拟机. # vm remove myvm 5)为名称为demo的虚拟机设置IP地址(IP地址为192.168.88.100). # vm setip demo 192.168.88.100 6)循环批量创建虚拟机(myvm_1,myvm_2,myvm_3,myvm_4,myvm_5). # vm clone myvm{1..5} 7)循环批量删除虚拟机(myvm_1,myvm_2,myvm_3,myvm_4,myvm_5). # vm remove myvm{1..5} 示例# 创建名为node1的虚拟机。 [root@server1 ~]# vm clone node1 Domain node1 started [ OK ] # 创建完成后,虚拟机自动启动。可以通过系统命令查看: [root@server1 ~]# virsh list Id Name State ---------------------------------------------------- 1 node1 running # 为创建的、名为node1的虚拟机配置IP地址:192.168.88.11 [root@server1 ~]# vm setip node1 192.168.88.11 # 登录虚拟机,默认密码为a [root@server1 ~]# ssh 192.168.88.11 root@192.168.88.11's password: # 修改yum配置 [root@localhost ~]# vim /etc/yum.repos.d/local.repo [BaseOS] name=CentOS Linux $releasever - BaseOS baseurl=ftp://192.168.88.240/dvd enabled=1 gpgcheck=1 # 删除名为node1的虚拟机 [root@server1 ~]# vm remove node1 vm node1 delete [ OK ] # 创建2台虚拟机,名称分别为web和db [root@server1 ~]# vm clone web db Domain web started [ OK ] Domain db started [ OK ] # 创建3台虚拟机,名称分别为node1、node2和node3 [root@server1 ~]# vm clone node{1..3} Domain node1 started [ OK ] Domain node2 started [ OK ] Domain node3 started [ OK ] # 删除刚才创建的5台虚拟机 [root@server1 ~]# vm remove web db node{1..3} vm web delete [ OK ] vm db delete [ OK ] vm node1 delete [ OK ] vm node2 delete [ OK ] vm node3 delete [ OK ]